Under Stairs Storage · How-To
15 Steps To Build Under Stairs Coat Storage Cheaply

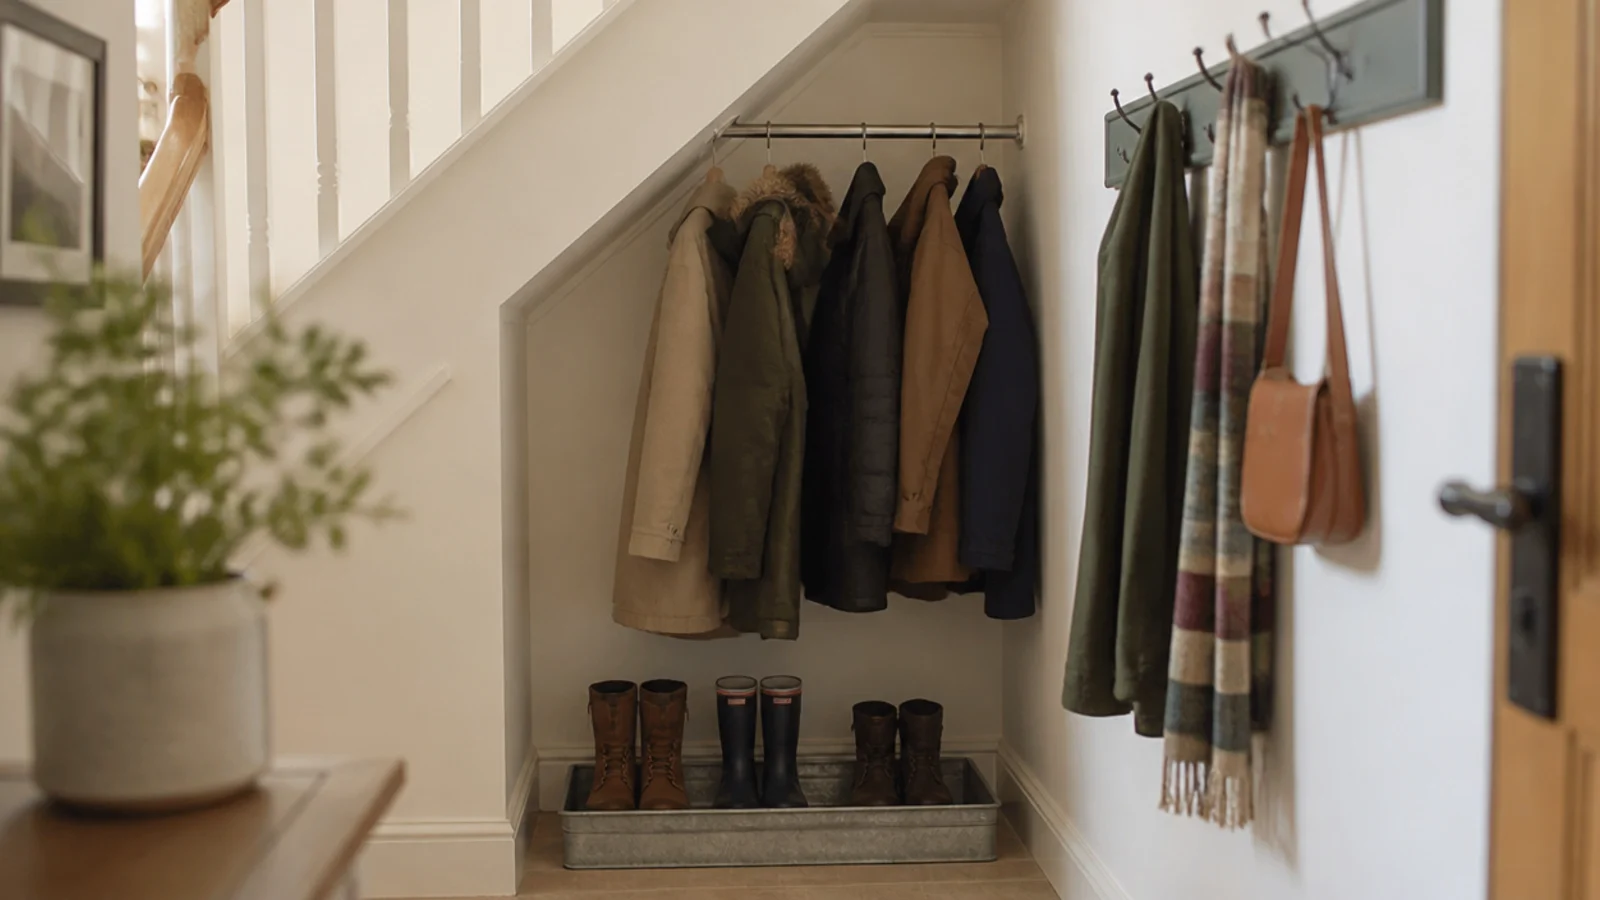
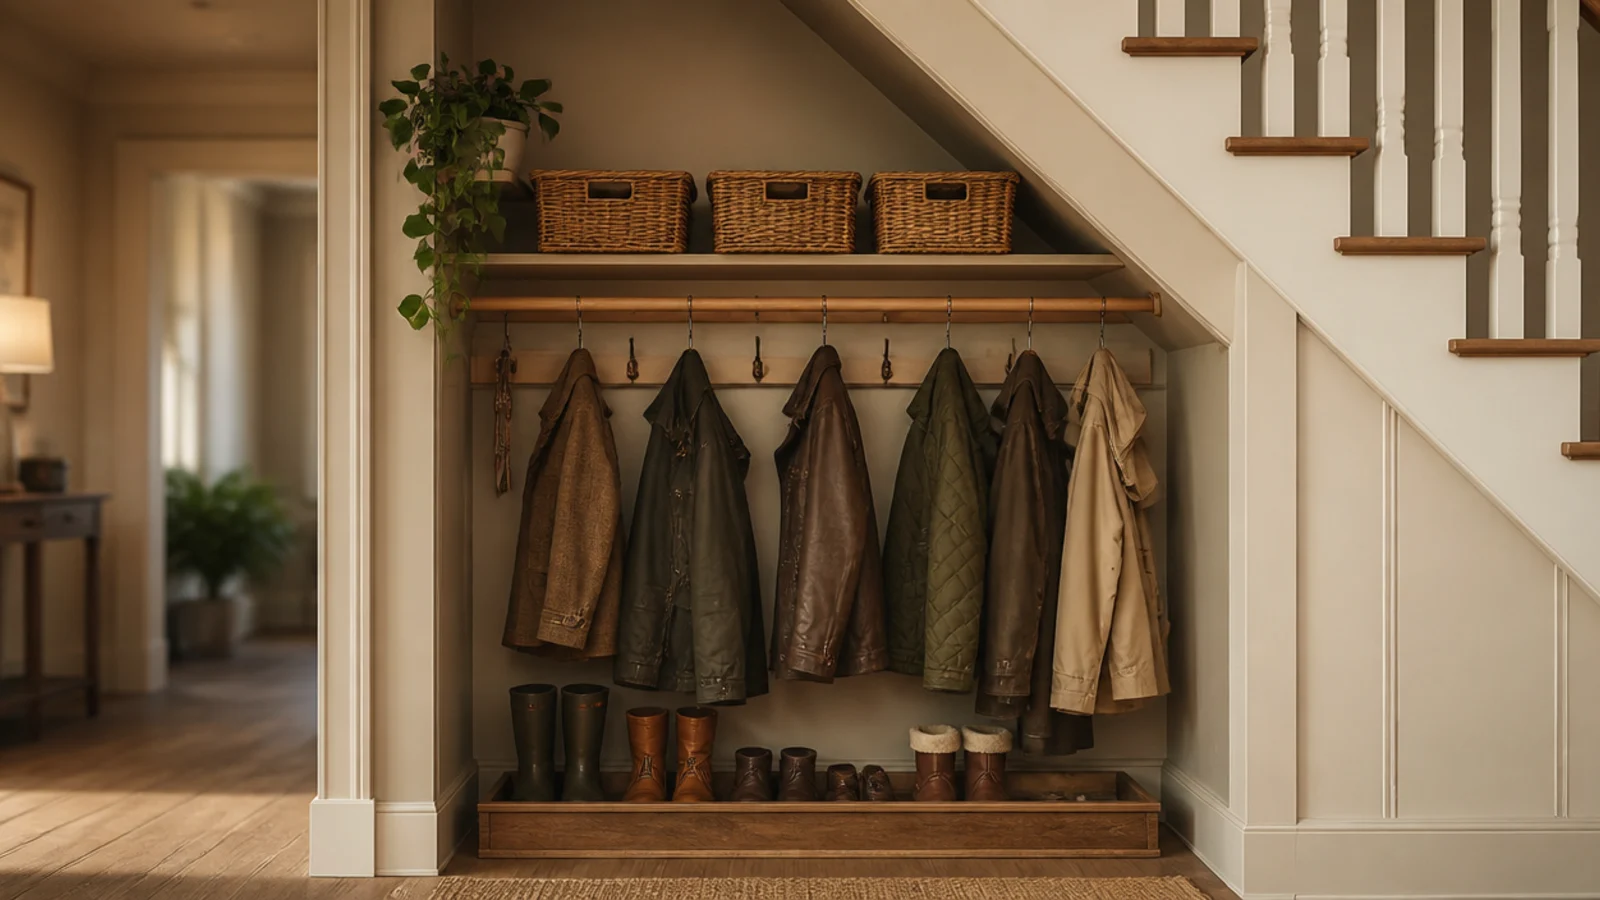
A coat rail under the stairs is the highest-value thing you can build in a hallway, and it is genuinely a Saturday job. Under stairs coat storage fails almost always on one number — the clear drop below the rail — and getting that right first means the rest is battens and screws. I have built this run twice, once badly and once properly, and the difference was fifteen minutes with a tape measure and a coat on a hanger. This is the sequence that works, for around £120 in materials.
In this guide18 sections — tap to openHide
- 1.What You'll Need For Under Stairs Coat Storage
- 2.Step 1: Count the coats that genuinely live in the hall
- 3.Step 2: Measure the drop your longest coat needs
- 4.Step 3: Mark the sixty-inch line on the soffit
- 5.Step 4: Find the strings and the services
- 6.Step 5: Decide between a rail, hooks, or both
- 7.Step 6: Set the rail height and its depth off the wall
- 8.Step 7: Cut and fix the battens level
- 9.Step 8: Fit the rail and support long spans
- 10.Step 9: Add a hook batten for the daily coats
- 11.Step 10: Build a shelf above for hats and gloves
- 12.Step 11: Put a boot tray and a bench underneath
- 13.Step 12: Fit a light you will actually use
- 14.Step 13: Give wet coats somewhere for the air to go
- 15.Step 14: Paint the run and seal the batten ends
- 16.Step 15: Load it by person and by season
- 17.Pro Styling Rules
- 18.Mistakes to Skip
What You'll Need For Under Stairs Coat Storage
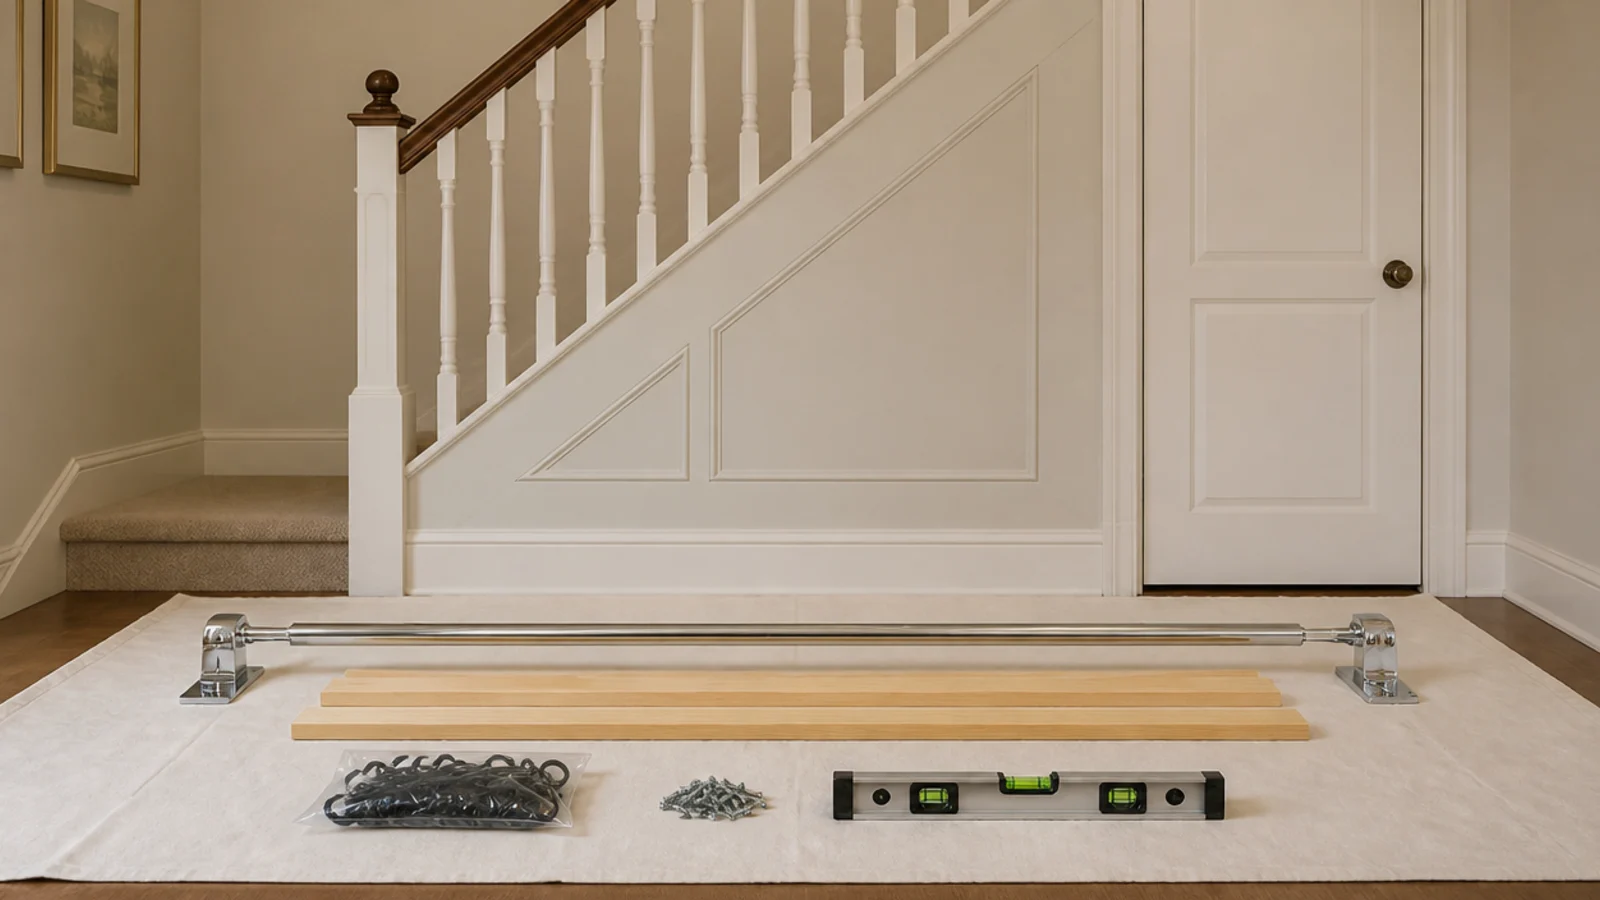
Everything here is stock from a builders merchant. You need a drill, a spirit level and a saw; nothing more specialised than that.
| Item | Spec that matters | Rough cost |
|---|---|---|
| Rail | 25mm chrome or steel tube, cut to length | £12–£18 |
| Rail sockets | One pair, plus a centre support | £8–£14 |
| Batten | 2x1in pine, roughly 5 metres | £10–£15 |
| Screws | 60mm into timber, 40mm for hooks | £8 |
| Hooks | Six to eight, cast iron or brass | £18–£30 |
| Shelf | 18mm ply offcut, cut to depth | £15–£20 |
| Boot tray | Galvanised, 24 x 15in with a lip | £12–£18 |
| Light | Battery PIR puck, 100–200 lumens | £12–£18 |
| Paint | Water-based eggshell, one litre | £22–£28 |
Step 1: Count the coats that genuinely live in the hall
Lay every coat that lives near the front door on the floor and count them. Not the wardrobe coats — the hall coats.
Most households land on one to two per person in daily use plus two or three seasonal spares. Note how many are full length, because those set your rail height. My own count was eight, which is a very different brief from the twenty-coat rail I had sketched.

Step 2: Measure the drop your longest coat needs
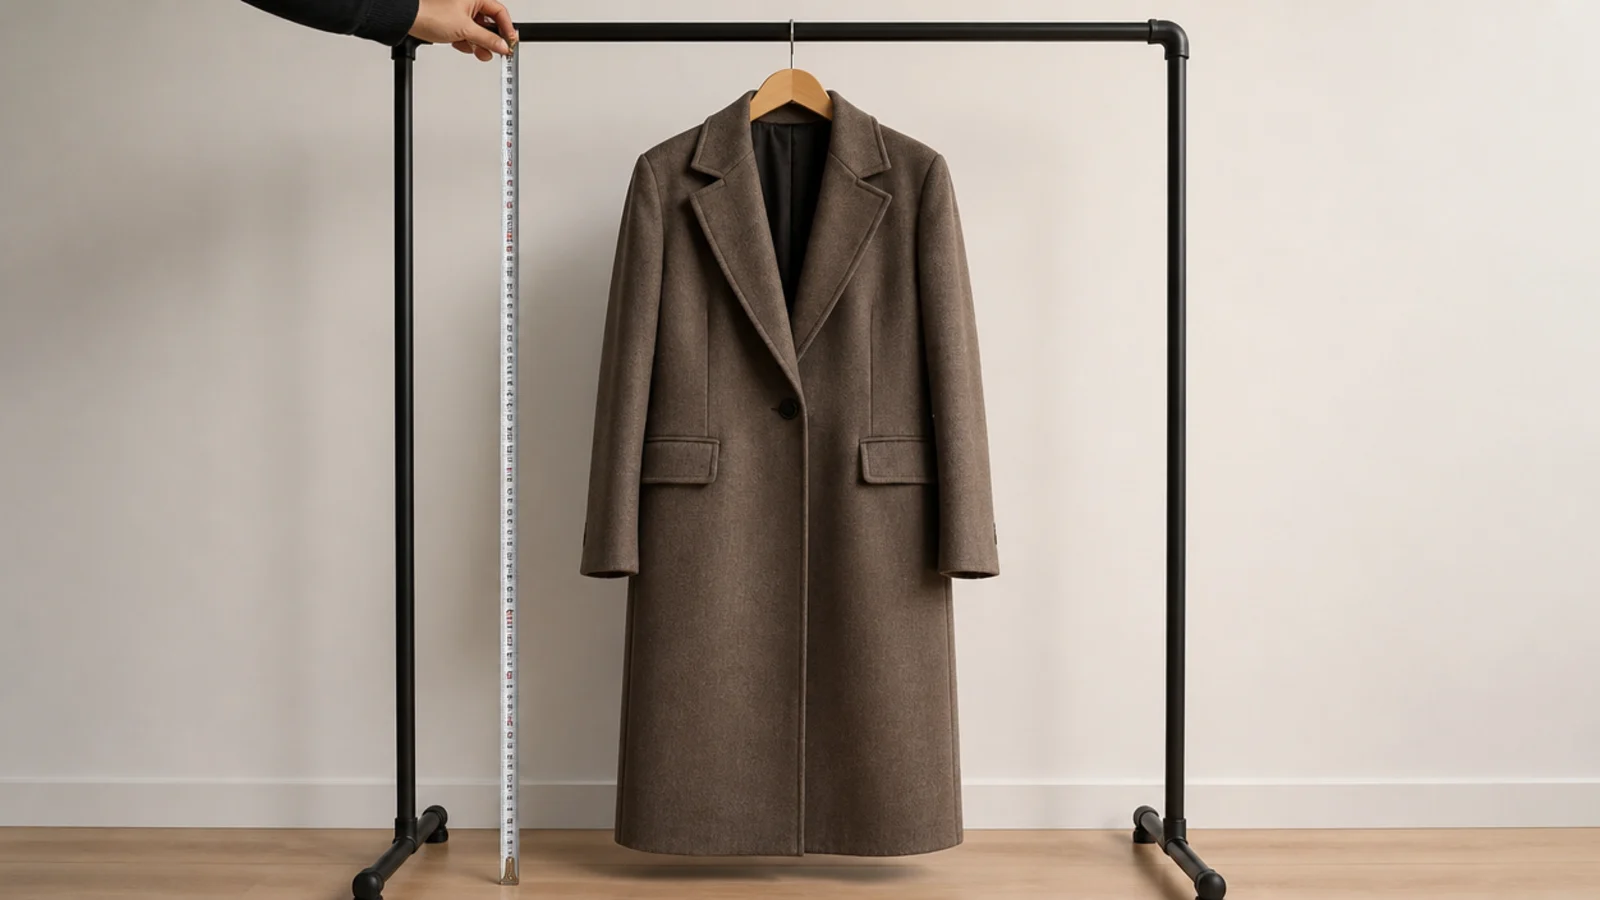
Hang your longest coat on a hanger, hold it up, and measure from the top of the hanger hook to the hem.
A jacket typically needs 39 inches of clear drop, a knee-length coat 44, and a full-length coat 55. Add two inches so the hem never brushes the boots below. This one number decides where the rail can go and how far along the run it can travel.
Step 3: Mark the sixty-inch line on the soffit
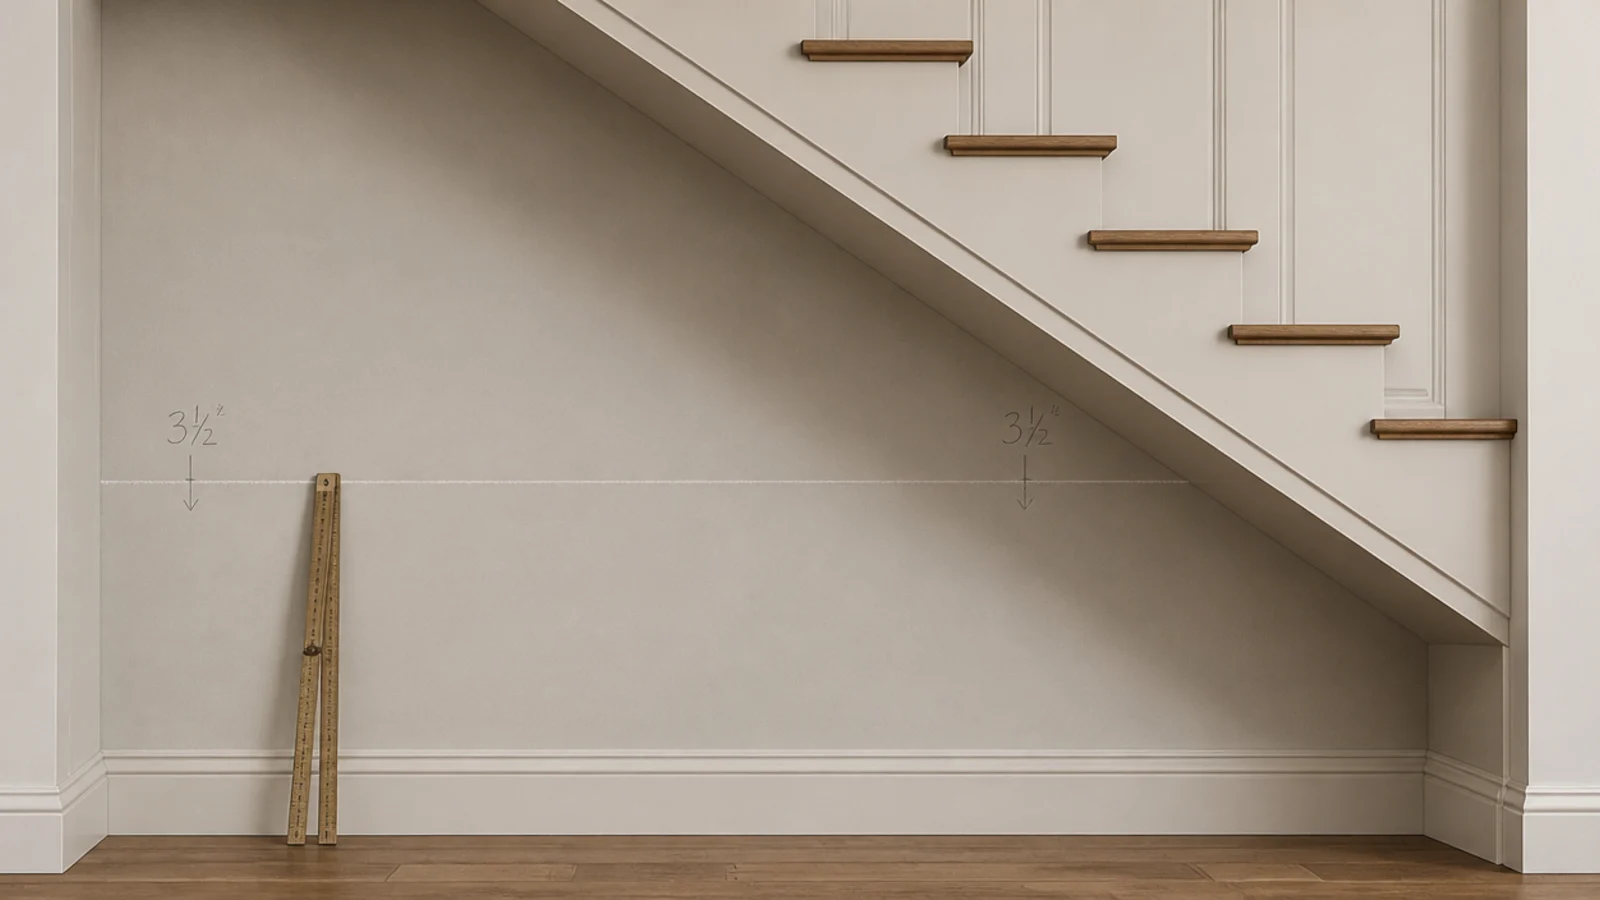
Chalk a line across the soffit at the point where the height drops below 60 inches, then a second where your required drop plus rail height stops fitting.
A flight sheds nine to ten inches of headroom for every foot travelled toward the bottom step, so the rail runs out of usable space faster than the floor suggests. Everything beyond that second line becomes shelving, hooks or shoes.
Step 4: Find the strings and the services
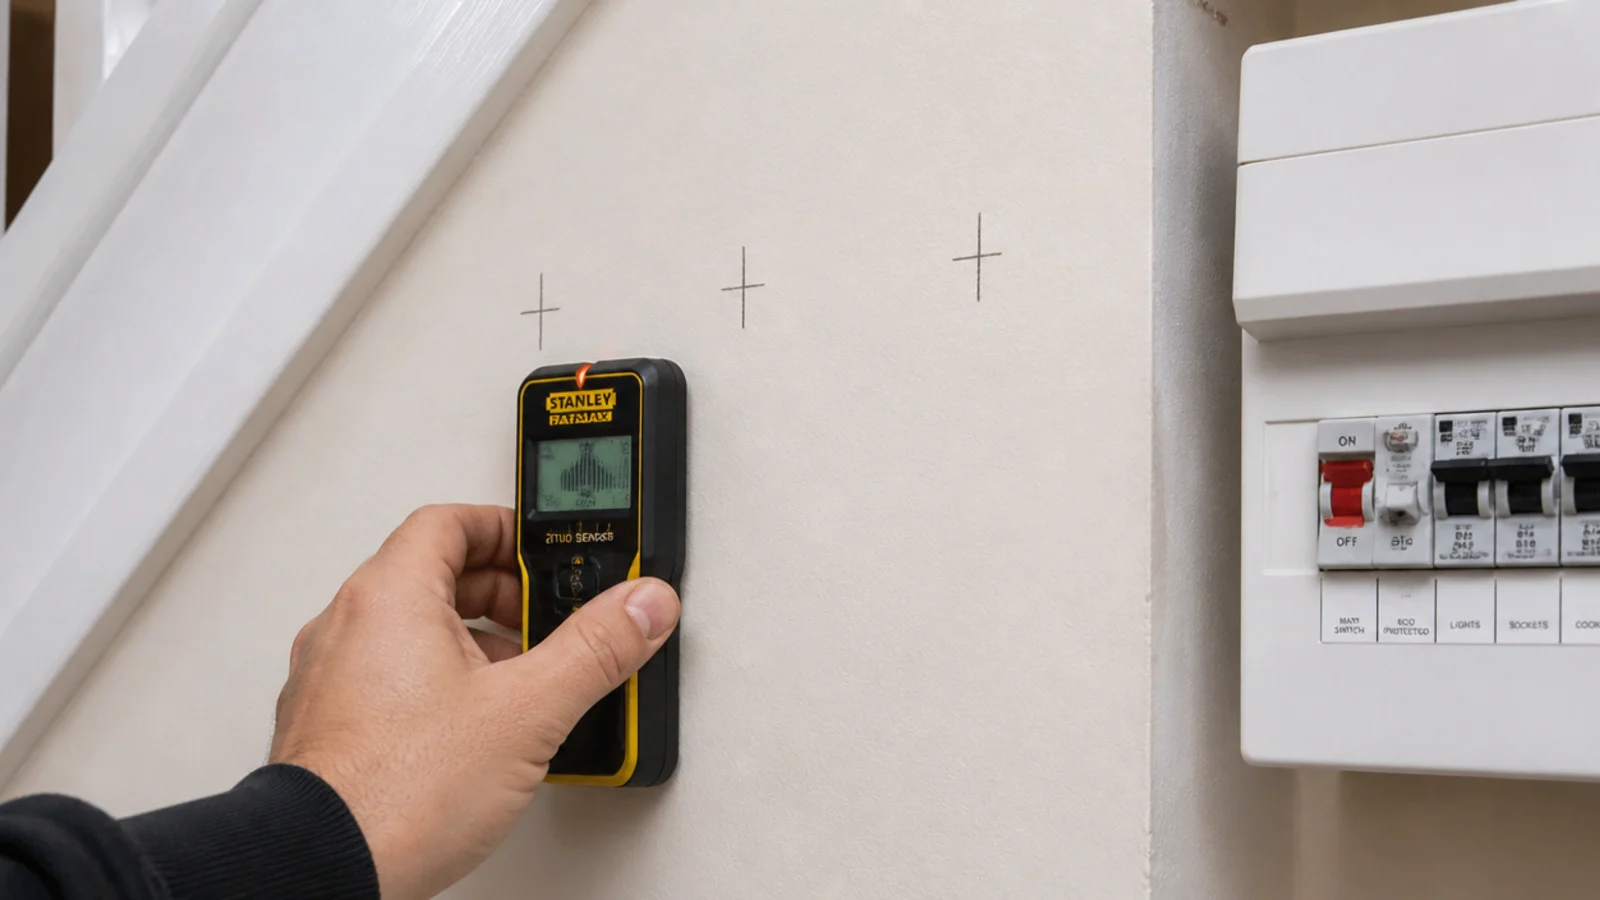
Run a stud detector along both side walls and mark the timber. The stair strings are your fixing points, and plasterboard plugs carry only around ten pounds each — ten wet winter coats will exceed that.
While you are looking, locate the boiler, gas meter and consumer unit if any of them sit here. None may be enclosed: leave that zone open with a removable panel, and never hang a rail across it.
Step 5: Decide between a rail, hooks, or both
Nobody hangs a school coat on a hanger at eight in the morning, so both is usually the answer.
A rail takes the coats that live there all season. Hooks near the opening take the two or three in constant use. Splitting the job this way is what stops the rail becoming a solid wall of fabric nobody can get a hand into.
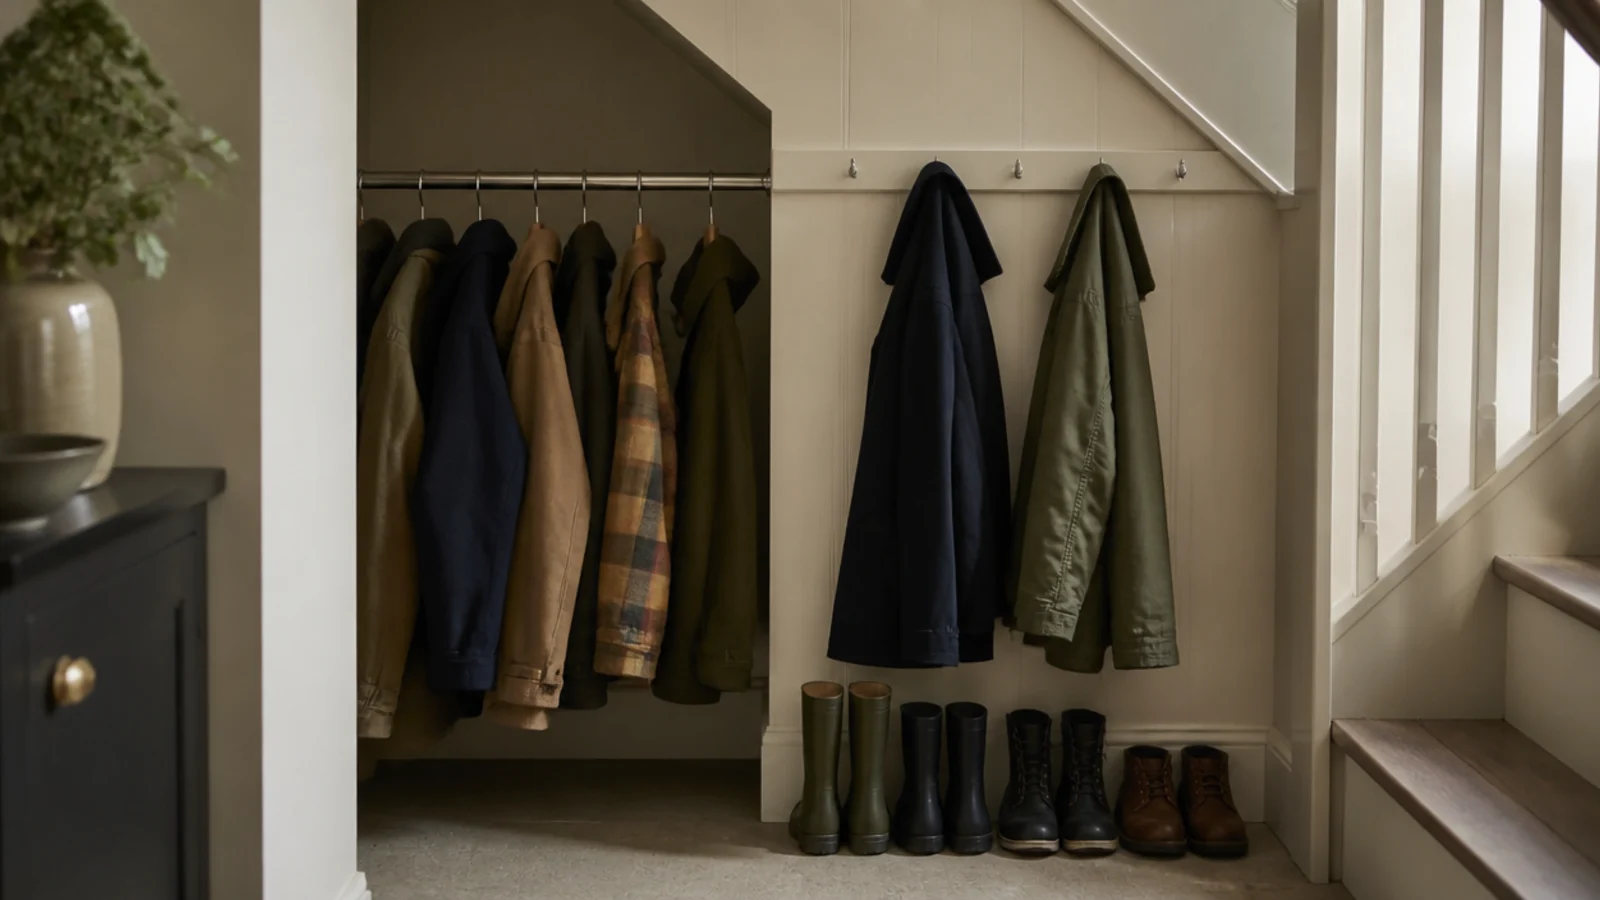
Step 6: Set the rail height and its depth off the wall
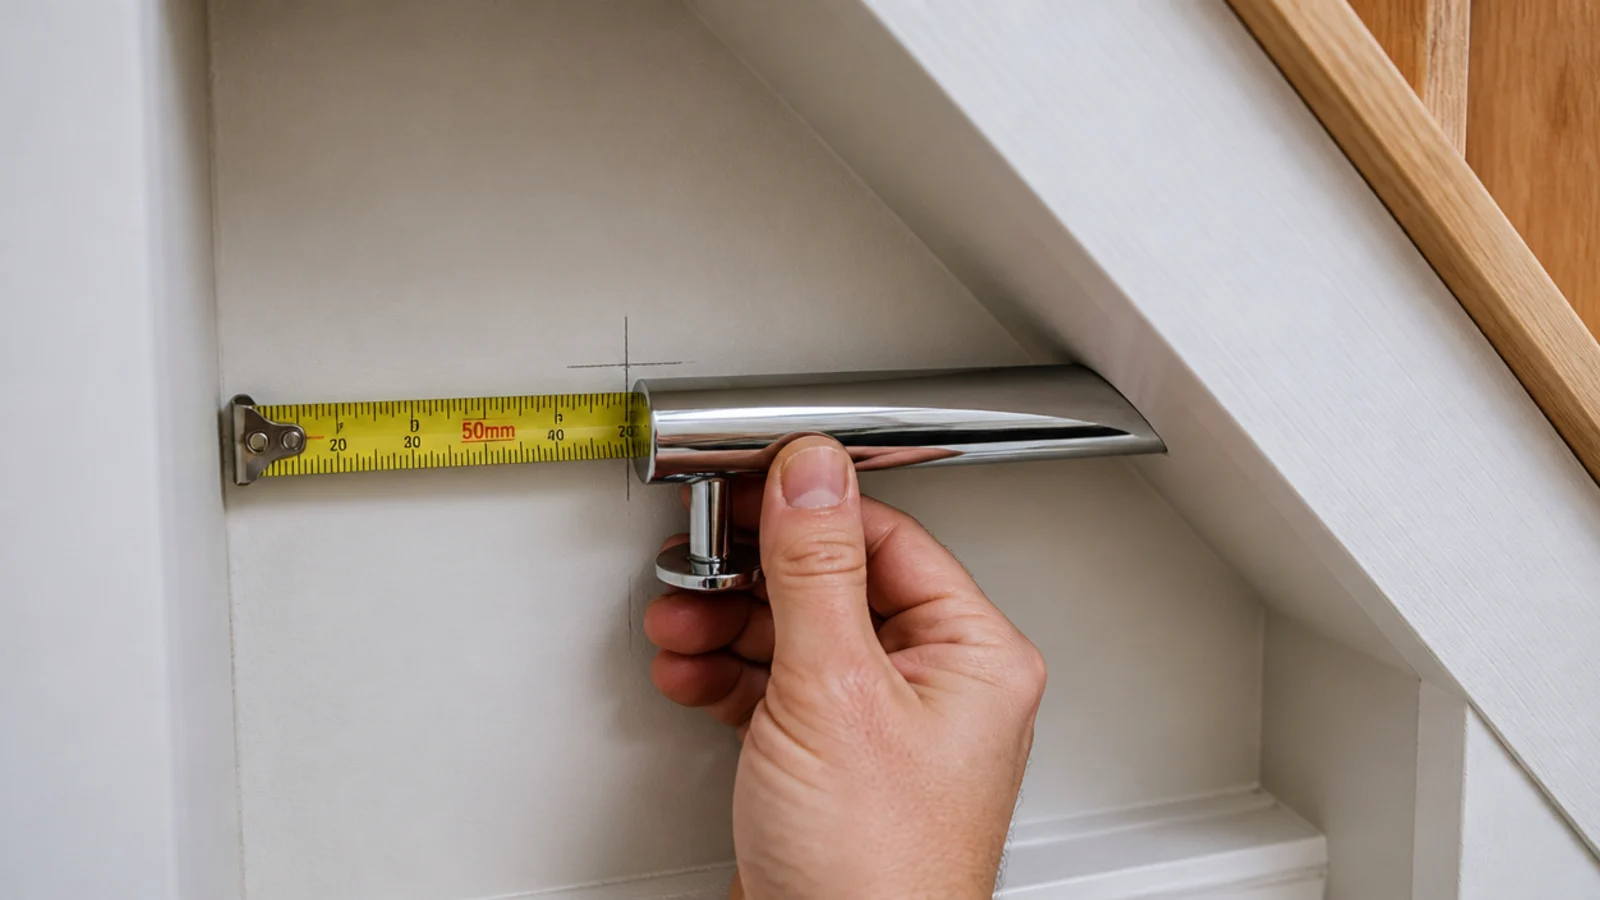
Position the rail 22 to 24 inches out from the back wall. A hanger is 17 to 18 inches wide and needs clearance behind and in front, or the shoulders press on the door and hold a crease.
Set the height so your longest coat clears the floor by two inches. In a shallow recess, run a pull-out valet rod front to back instead — it needs only about 10 inches.
Step 7: Cut and fix the battens level
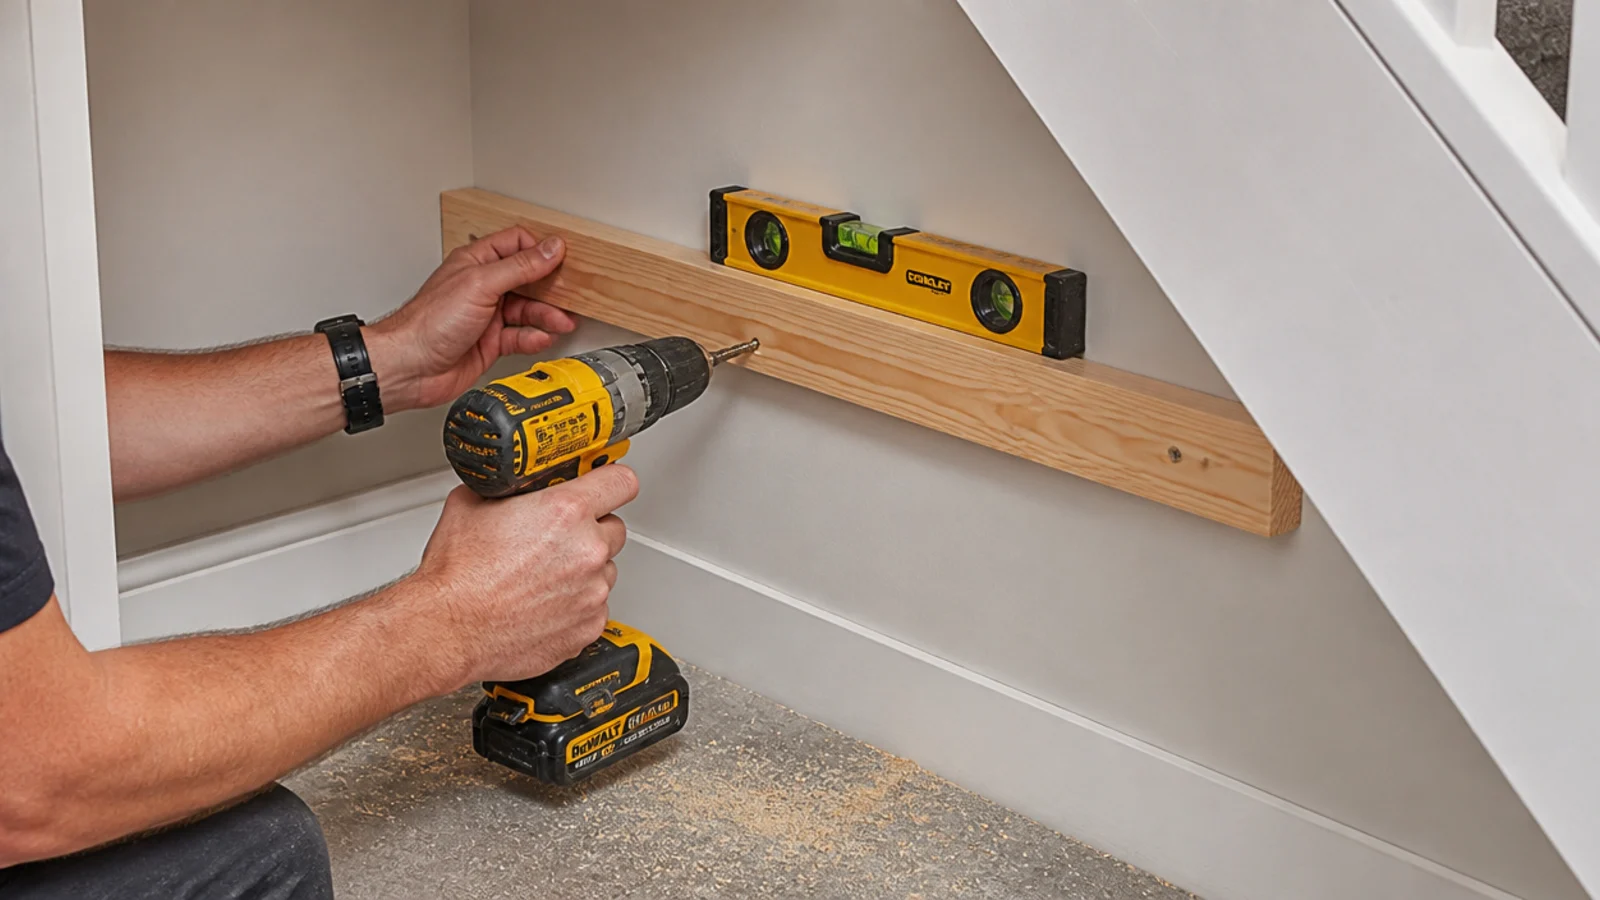
Cut 2x1 inch pine to length, hold it against the wall with a level on top, and screw into the strings with 60mm screws.
Level matters more than height precision here. A rail on a batten that runs downhill will slide every hanger to one end, and you will notice it every single day. Check the level twice before the second screw goes in.
Step 8: Fit the rail and support long spans
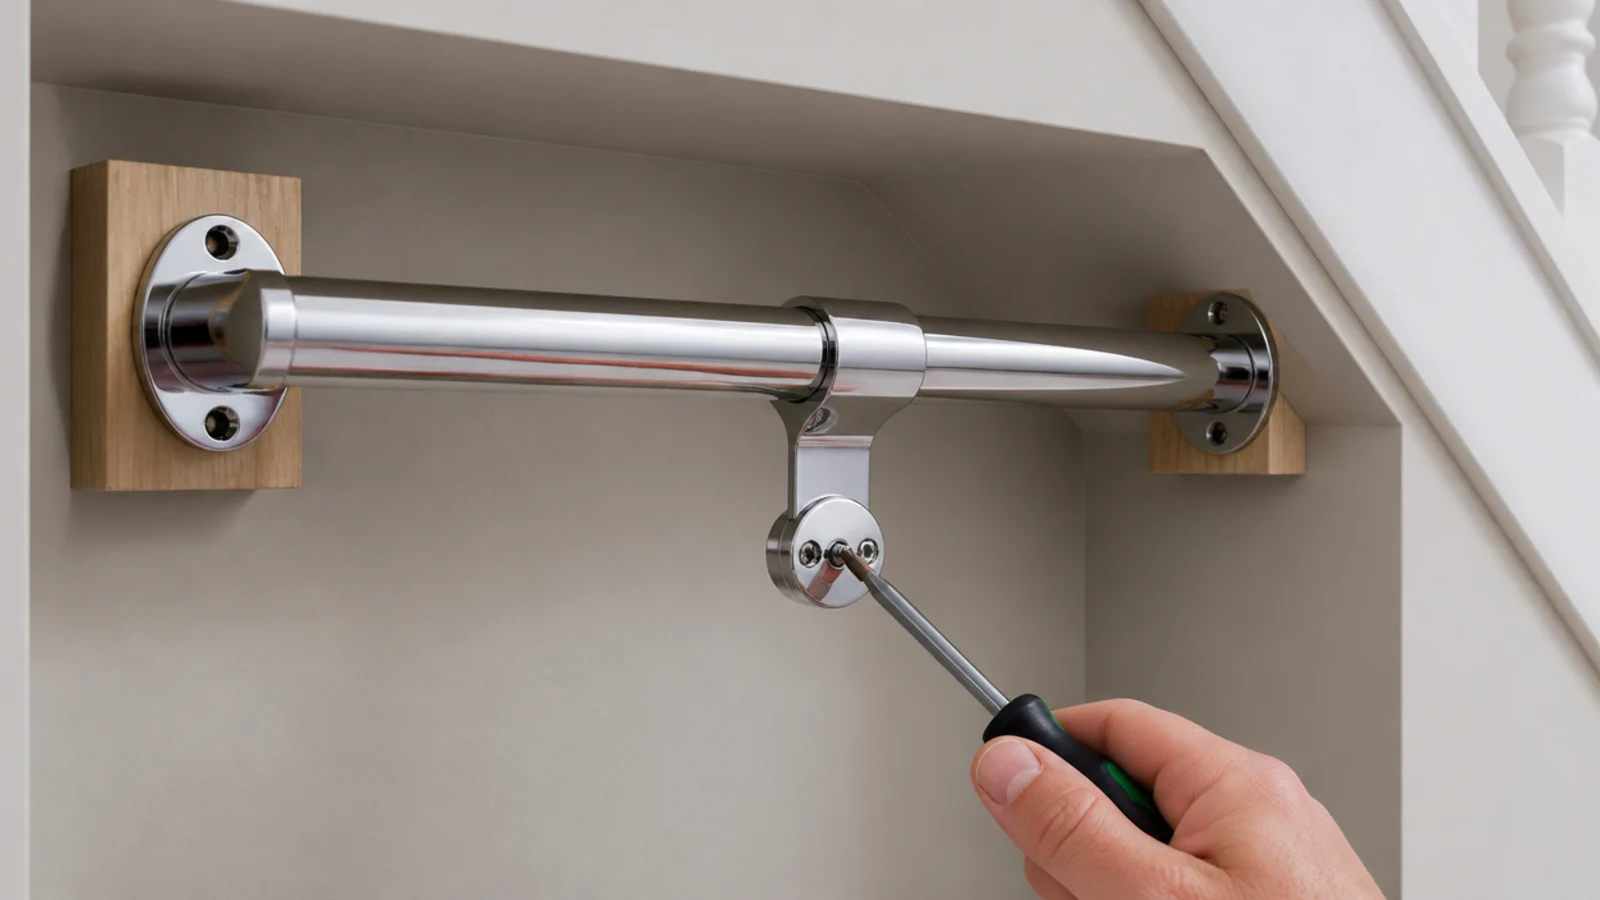
Screw the end sockets to the battens, cut the tube to length with a hacksaw and file the cut end smooth.
A 25mm rail spanning more than about 36 inches needs a centre support bracket, or it bows under a winter's worth of coats. Ten coats is roughly 30 pounds spread across the span, and a bowed rail never straightens.
Step 9: Add a hook batten for the daily coats
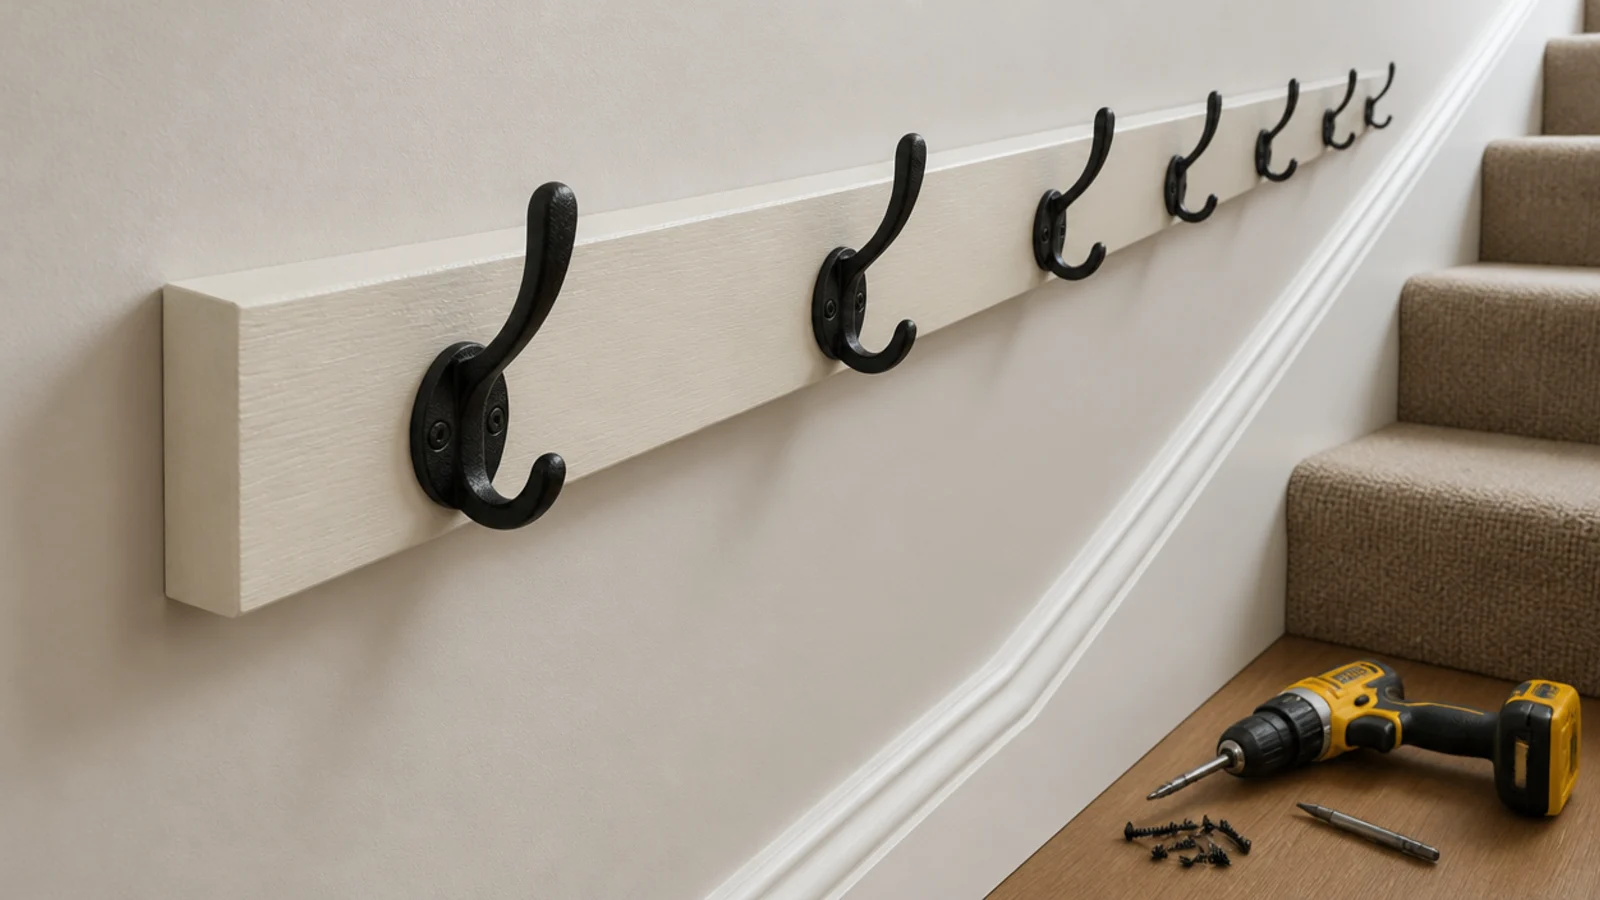
Fix a painted batten to the flank wall and screw the hooks into it, spaced 8 to 10 inches apart. Bulky parkas want the wider spacing.
Adult hooks go at 63 to 67 inches, child hooks at 41 to 47. Under a rake you may not get adult height at the shallow end, so put the adults on the tall third and the children where the ceiling drops.
Step 10: Build a shelf above for hats and gloves
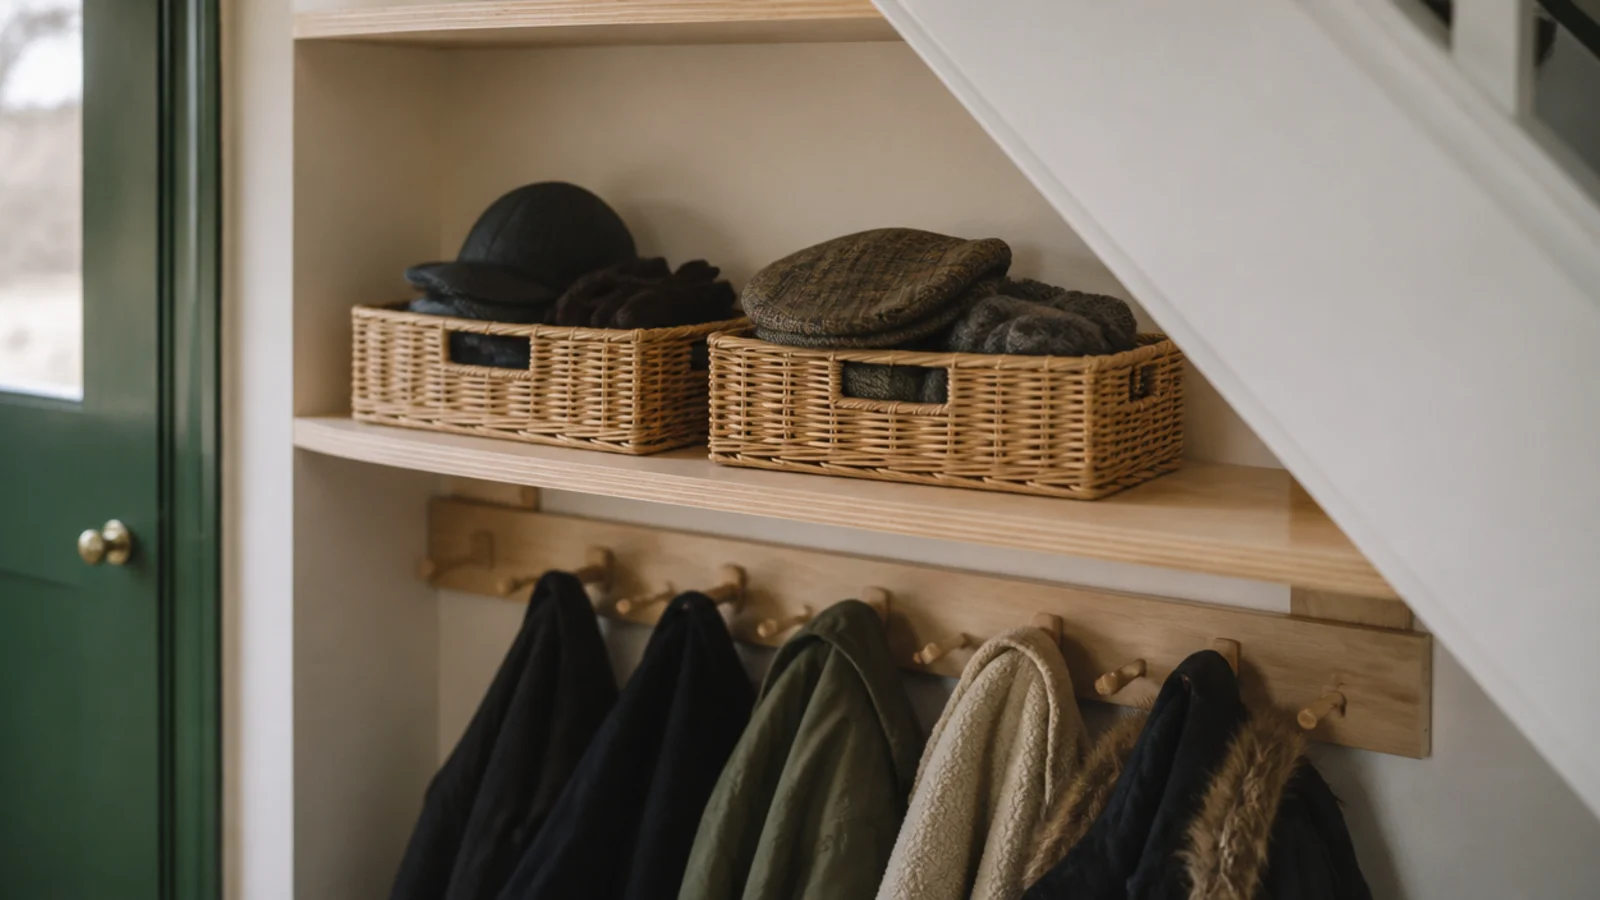
A plywood shelf on battens at 78 to 84 inches takes hats, gloves and the seasonal spares. That height is a stretch for most people, which makes it the right home for things touched twice a year.
Use two matching baskets rather than loose piles — a stack of knitwear at that height collapses forward the first time you pull anything out.
Step 11: Put a boot tray and a bench underneath
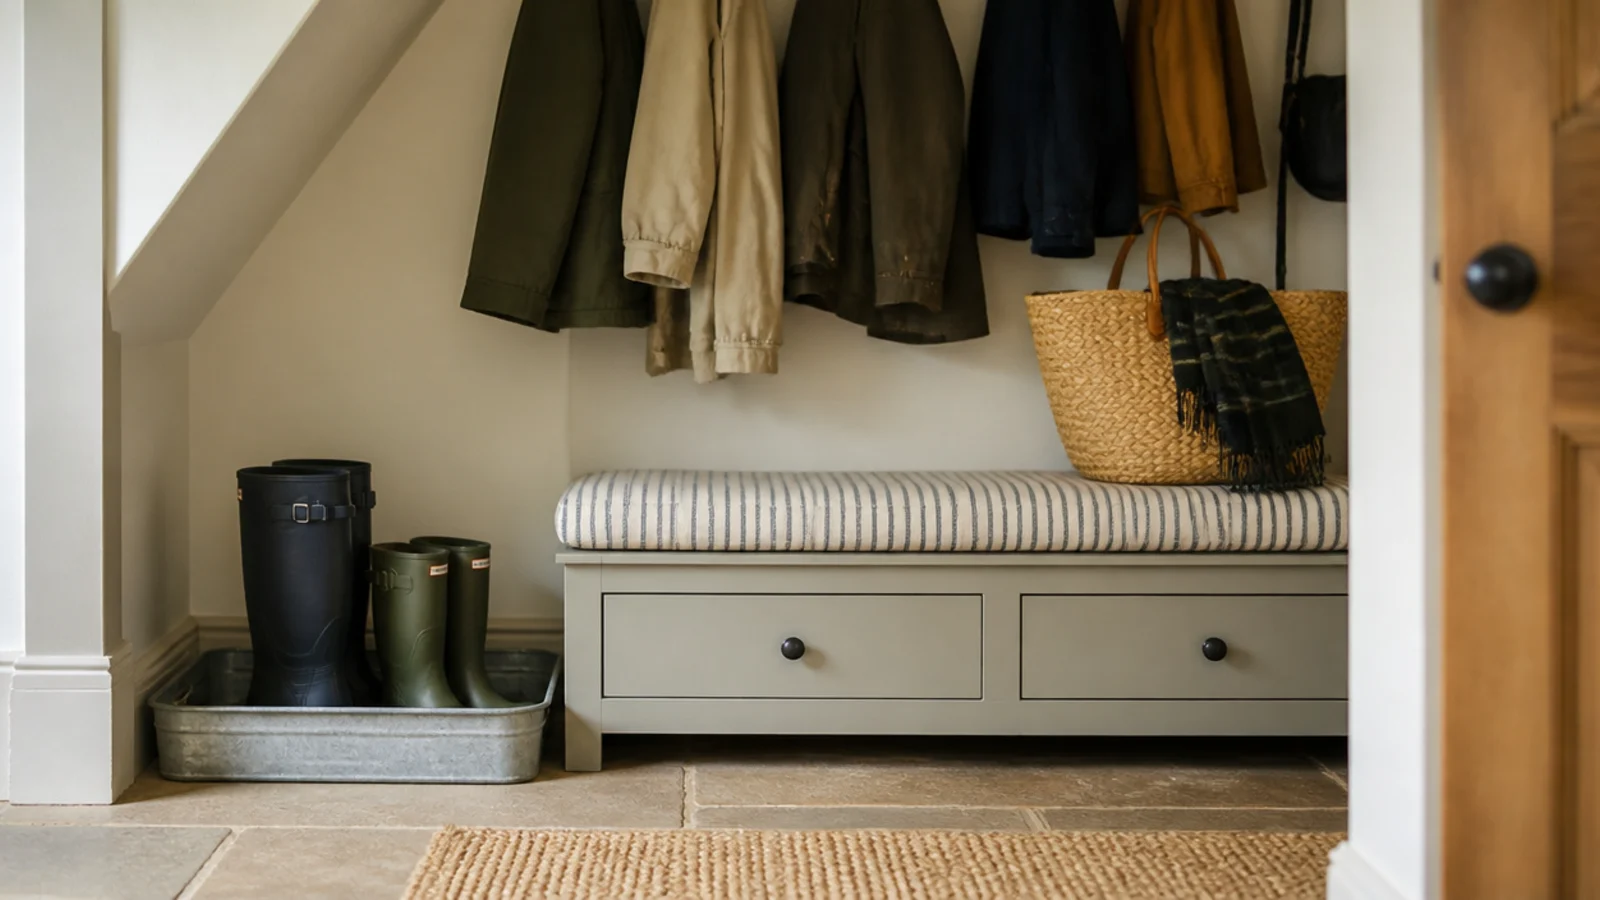
A galvanised tray 24 by 15 inches with a lip catches everything wet boots shed. Below hanging coats is exactly where the drips land.
If there is room, add a bench at 18 inches to the finished cushion — the height people actually sit at to pull boots on. Sixteen feels low to stand from and twenty leaves children swinging their legs.
Step 12: Fit a light you will actually use
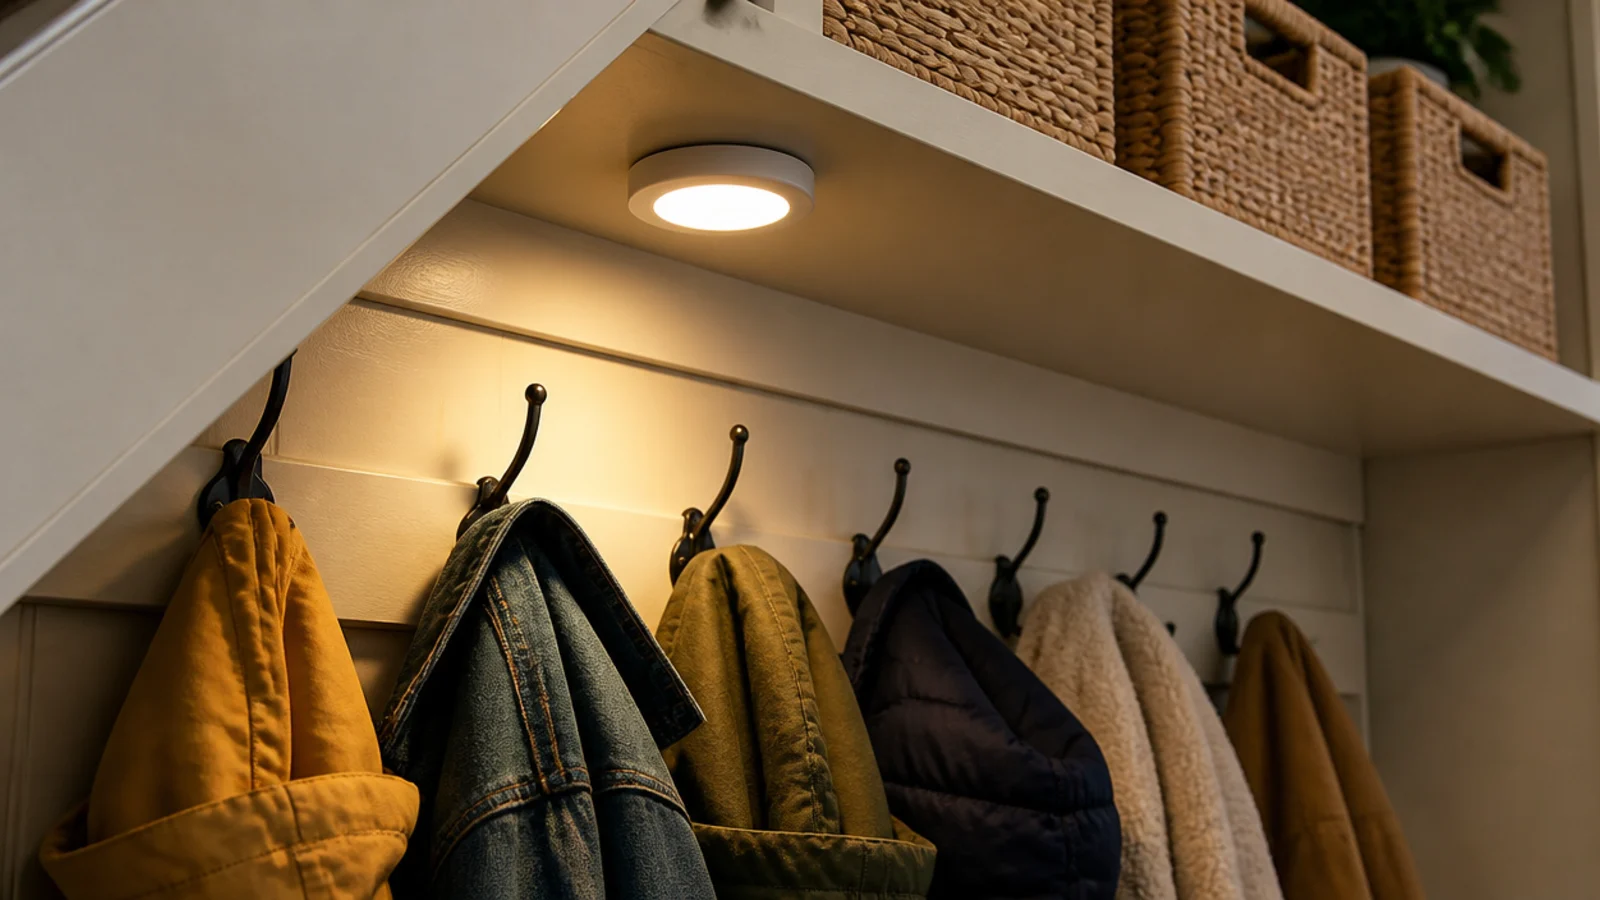
A battery PIR puck at 100 to 200 lumens, stuck high and toward the front so it does not throw your shadow into the space.
An unlit coat store gets used for the first coat on the rail and nothing beyond it. This is a £15 item that decides whether the whole build works, and it takes about two minutes to fit.
Step 13: Give wet coats somewhere for the air to go
Wet wool in a closed cupboard raises the humidity fast, and if the recess backs onto an external wall that moisture condenses on cold plaster.
A 10mm undercut below the door or a small louvred grille keeps air moving. Leave two inches between the back of the coats and any external wall, and never dry a soaked coat in a sealed cupboard — hang it in the open first.
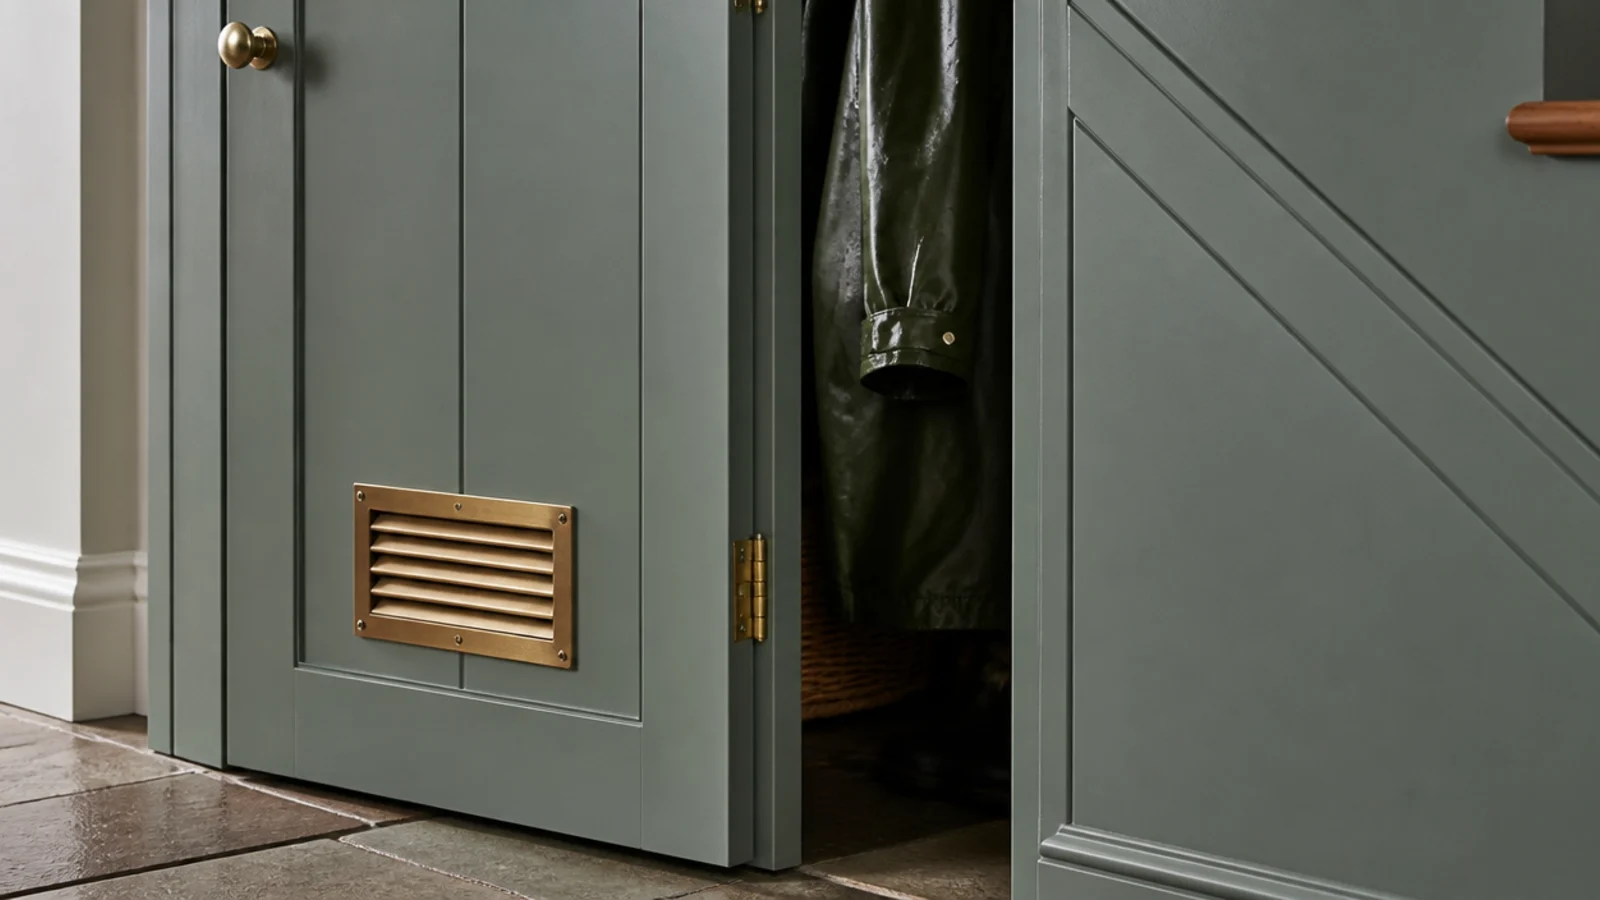
Step 14: Paint the run and seal the batten ends
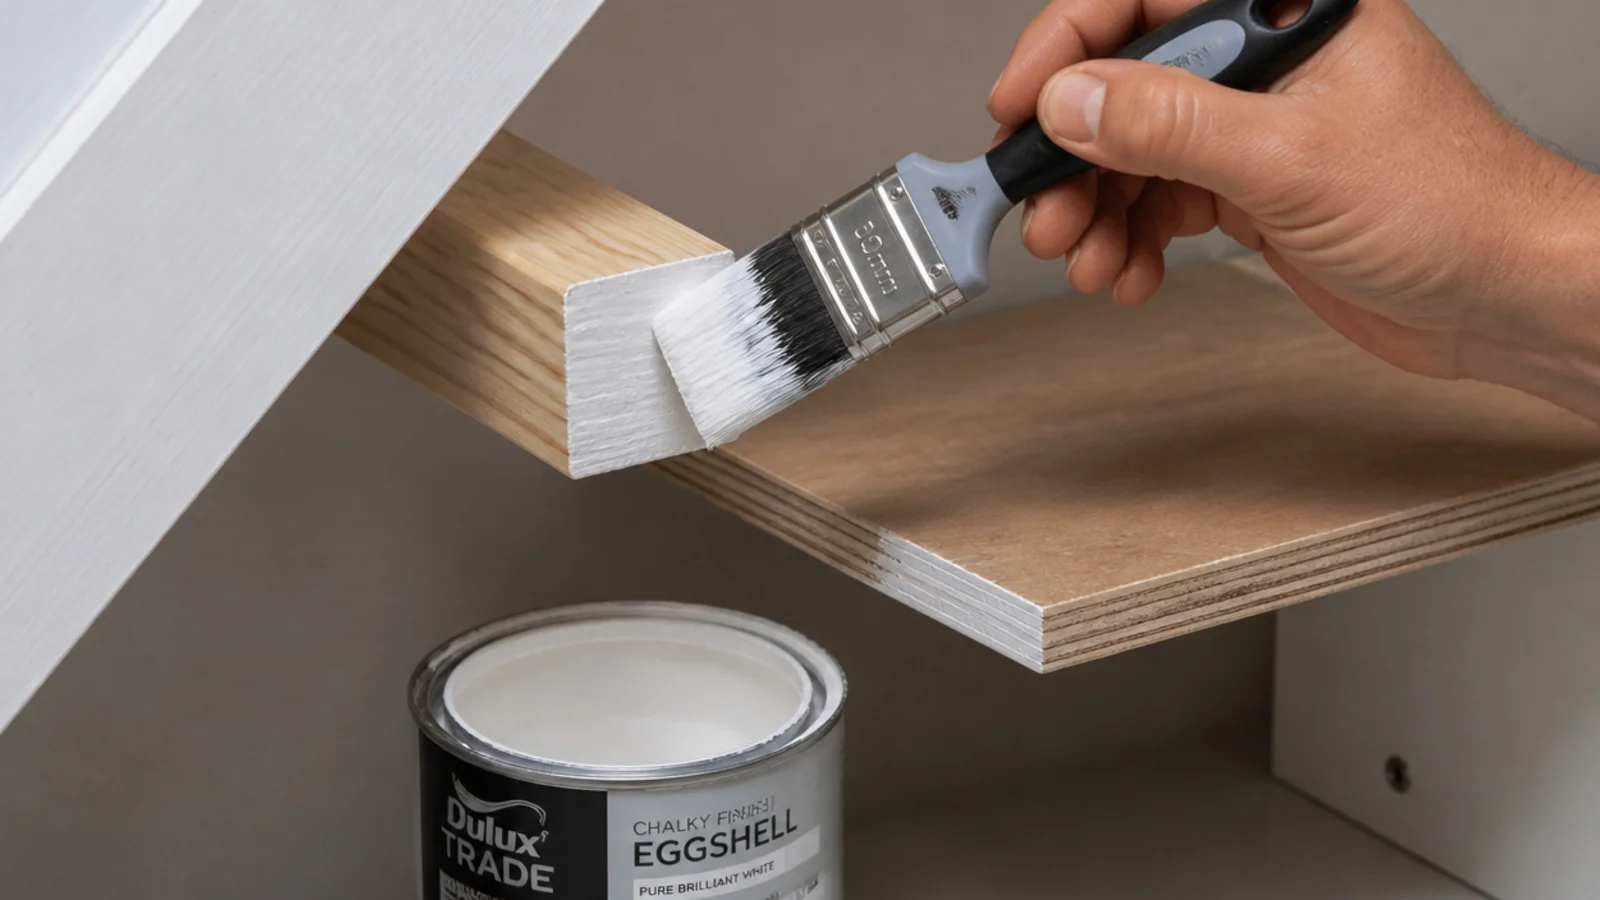
Two coats of water-based eggshell over everything, including the cut ends of the battens and the plywood shelf edges.
Eggshell wipes clean; matt emulsion marks the first time a wet sleeve brushes it. Painting the joinery and the wall the same colour is also what stops the run reading as a piece of furniture jammed under a staircase.
Step 15: Load it by person and by season
Divide the rail into a zone per person with two timber dividers. Allow 12 inches of rail per adult in daily use and 8 per child.
Put winter at the front in October and swap it for the summer jackets in April. And keep the floor at the foot of the stairs clear of bags and boots — that run is the escape route from every room above.

Pro Styling Rules
Mistakes to Skip
- Fixing the rail before measuring your longest coat on its hanger. Hems dragging on the boot tray is the most common fault in these builds, and moving a rail means filling and repainting.
- Screwing the batten into plasterboard rather than the stair strings. Ten wet coats exceed what plug fixings carry, and the failure usually takes a patch of wall with it.
- Sealing the recess completely. No undercut, no grille and wet coats inside is the exact recipe for black mould on the plaster by the end of the first winter.
- Hanging a rail across the gas meter or consumer unit to gain a few inches. Both must stay accessible, and a consumer unit also has to remain in a non-combustible enclosure.
Frequently asked questions
How high should a coat rail go under the stairs?
High enough that the longest coat clears the floor by a few inches. A jacket needs thirty-nine inches of clear drop, a knee length coat forty-four and a full length coat fifty-five. Measure your longest coat on its hanger before you fix anything, because moving a rail means filling and repainting two walls.
How far apart should coat hooks be?
Eight to ten inches apart for single coats, and more if the coats are bulky winter parkas. Adult hooks go at sixty-three to sixty-seven inches, child hooks at forty-one to forty-seven. Under a rake you often cannot reach adult height at the shallow end, so run adults on the tall third.
What do I fix a coat rail to under the stairs?
A timber batten screwed into the stair strings, never into plasterboard alone. Plasterboard plugs carry around ten pounds each and ten wet winter coats easily exceed that. Two by one inch pine and sixty millimetre screws into solid timber will carry far more than the rail ever holds.
How do you stop wet coats making a cupboard damp?
Give the air somewhere to go. A ten millimetre undercut beneath the door, or a small louvred grille, keeps moisture moving instead of condensing on the plaster. Add a drip tray under the wet gear, and leave a couple of inches between the back of the coats and any external wall.
How much does under stairs coat storage cost to build?
Around a hundred and twenty pounds in materials for a rail, brackets, battens, hooks, a shelf, a boot tray and a light. That assumes you already have a drill and a level. Fitted joinery for the same job starts near sixteen hundred, which is why this is the build worth doing yourself.
Measure the drop, fix into timber, and give the wet things air — those three decisions are what separate a coat run that lasts from one you rebuild in a year. For the full closet version with shoe tiers and a mirror, see the under stairs storage closet guide, and the under stairs storage guide sorts the rest of the wedge by height. If the whole hallway needs rethinking, entryway ideas covers lighting and drop zones, and small utility room layouts helps if wet gear is a daily problem.
Want more like this? Browse all 14 under stairs storage guides — they all use the same measurements and budget tiers.
Pin it for later
Save this to your Under Stairs Storage board
Pin it now so it is waiting for you when the tape measure comes out — and so the next person hunting for this idea can find it too.
Save this pinKeep going
More ideas worth saving while you have the tape measure out.